As you probably know by now, your camera has three settings that you have to be mindful of with every photo in order to get a properly exposed image. (Four, if you include white balance, but for the purposes of this discussion, we're only talking about shutter speed, aperture, and ISO.) In our classes, we talk about those three as the exposure triangle and explore how they work together to manage the light that enters your camera, giving you an image that is not too dark and not too bright but just right.
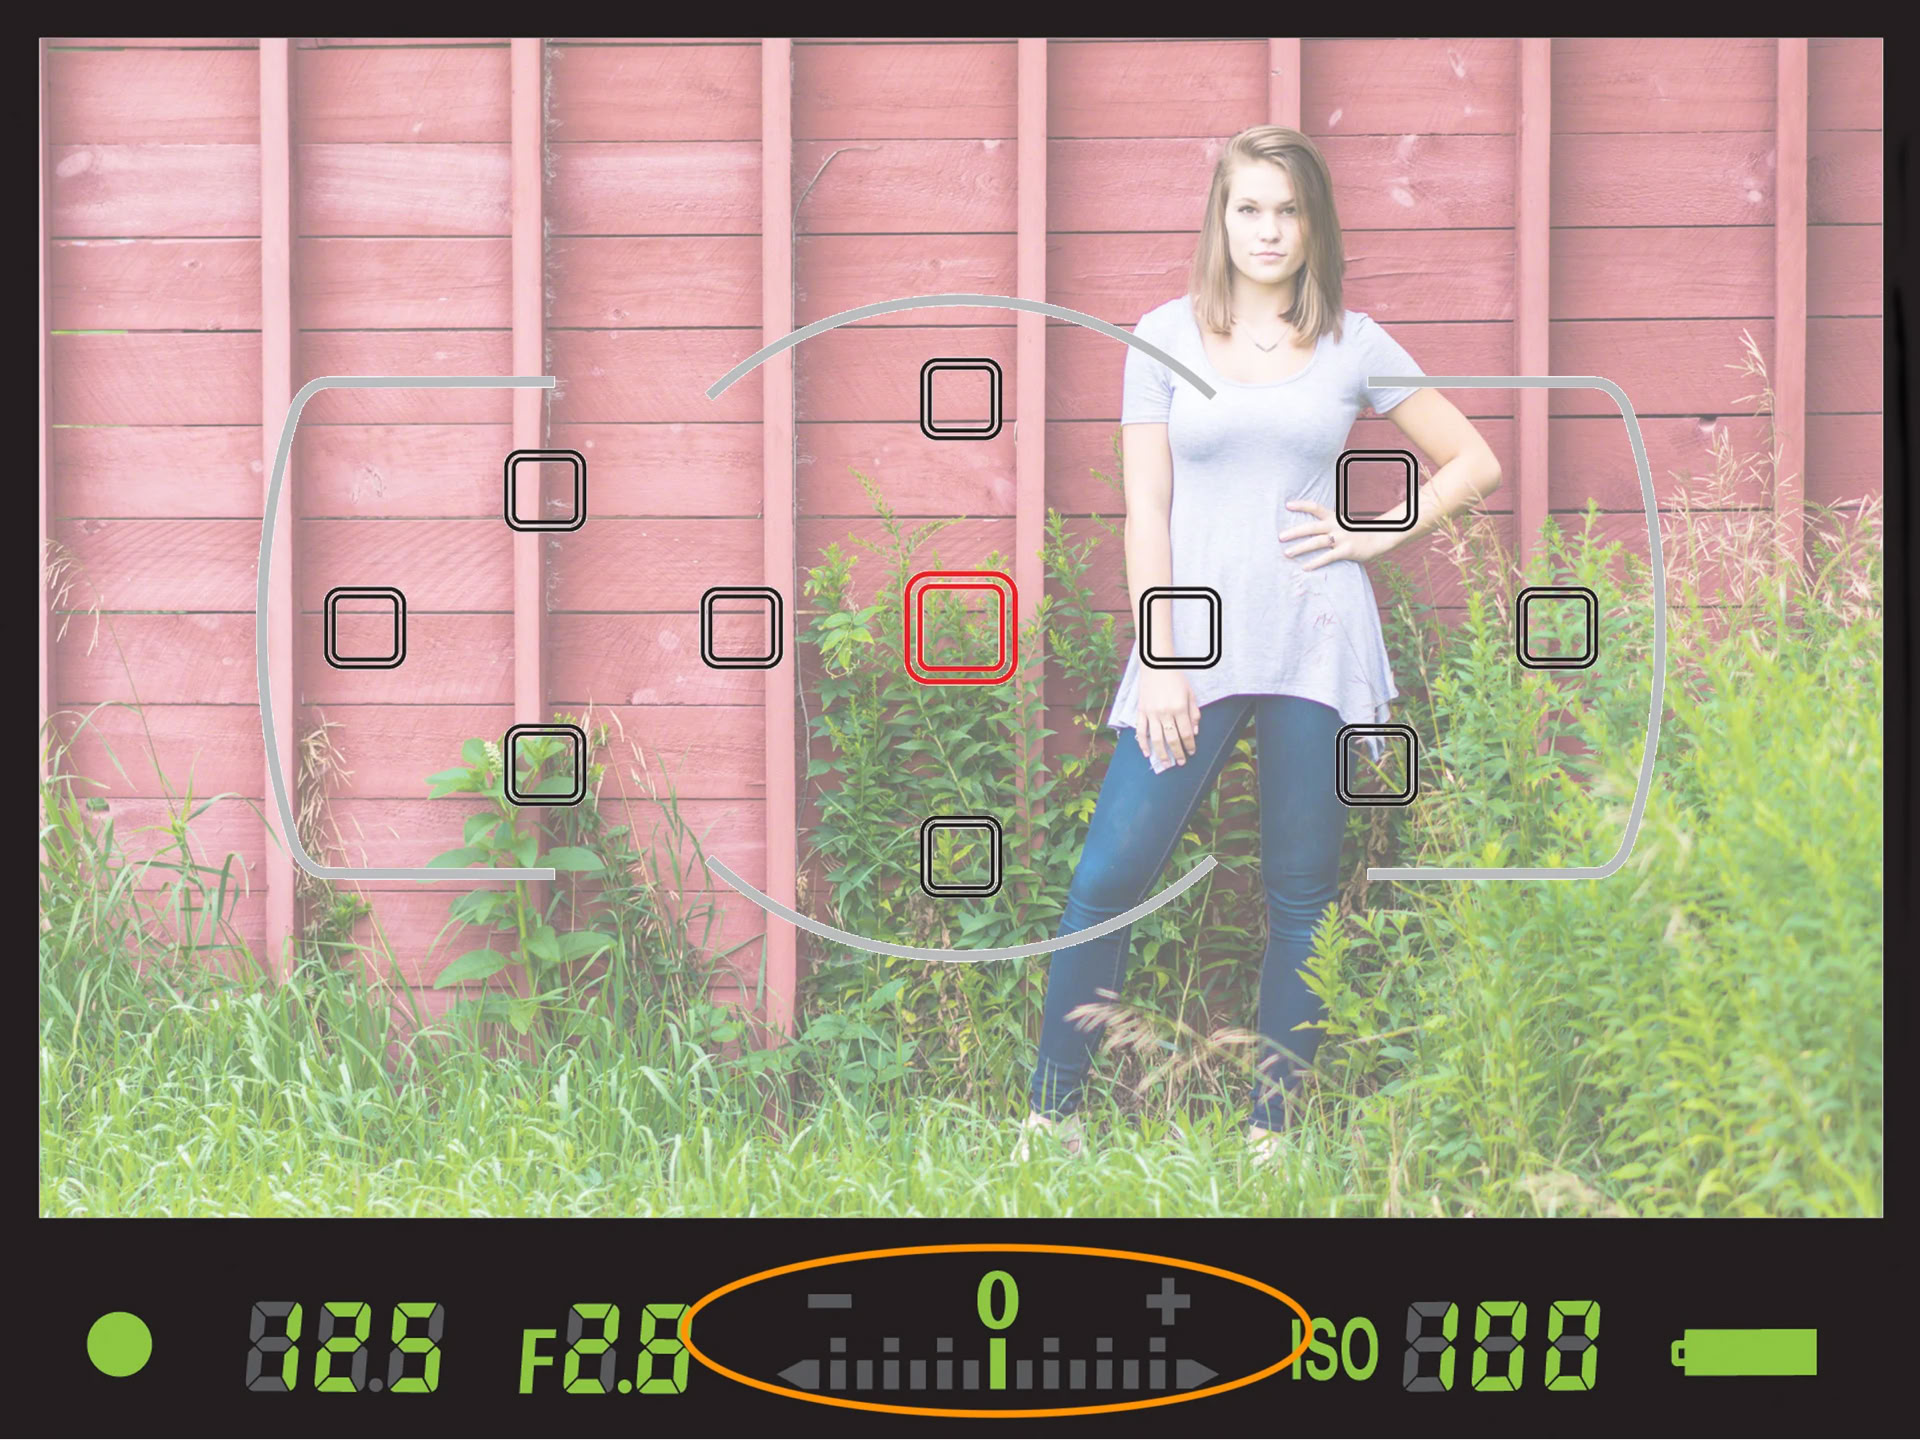
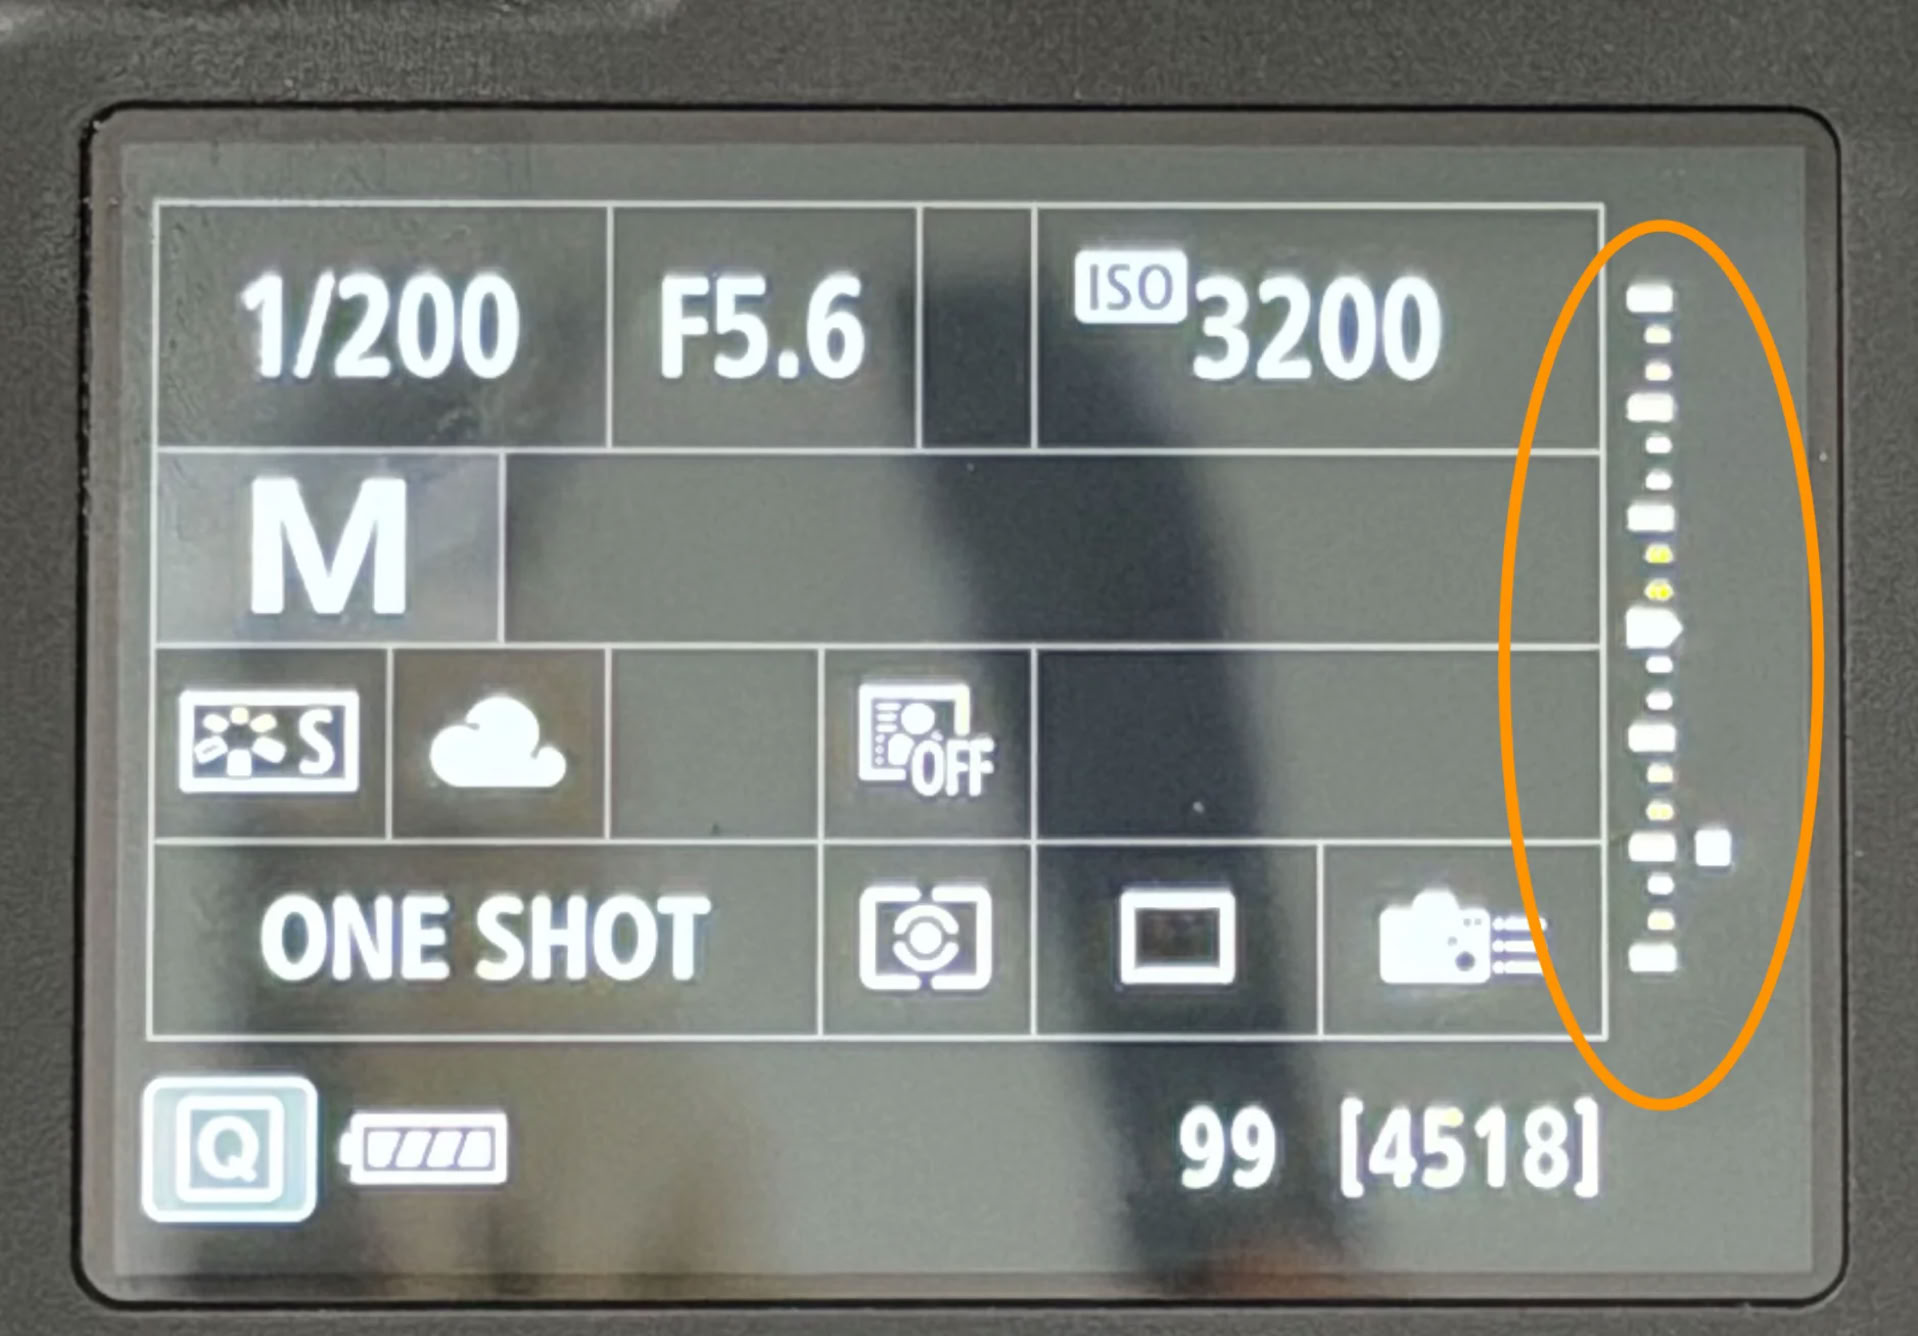
And how do you know if you've found those "just right" settings? The answer is that your camera's light meter will tell you. You'll find that typically at the bottom of your viewfinder window or the screen on the back of your camera, though some display the meter vertically. When the exposure indicator rests on the center mark of the light meter, usually labelled 0, that will produce a correctly exposed image. Essentially, your camera is looking for middle gray values in the scene you're photographing and its read of the lighting is based on reproducing that true middle gray.
While it can sometimes feel like our cameras are sentient beings with minds of their own, that's not really true. You are in control ... or at least you should be. That means that sometimes you will need to tell the camera what middle gray is. If you've taken our Photography 1 course, you've already had practice metering off the gray card that is part of the study kit that's included with the course tuition. (If you haven't taken our Photography 1 course, what are you waiting for?) The gray card comes in handy for tricky lighting situations where the camera might struggle to determine where that middle gray is. Think a dark foreground with a bright sky, or a field of snow with heavy storm clouds in the background. In that case, you can use the gray card to set your camera for a properly exposed subject by pointing your camera at the gray card, allowing it to fill the entire viewfinder, depressing the shutter button halfway to wake up your camera's metering system, and adjusting the settings until your camera's light meter reads 0. Then, without changing anything, frame up your shot, and capture the image -- no matter what the light meter says, you'll be properly exposed for that middle gray value.
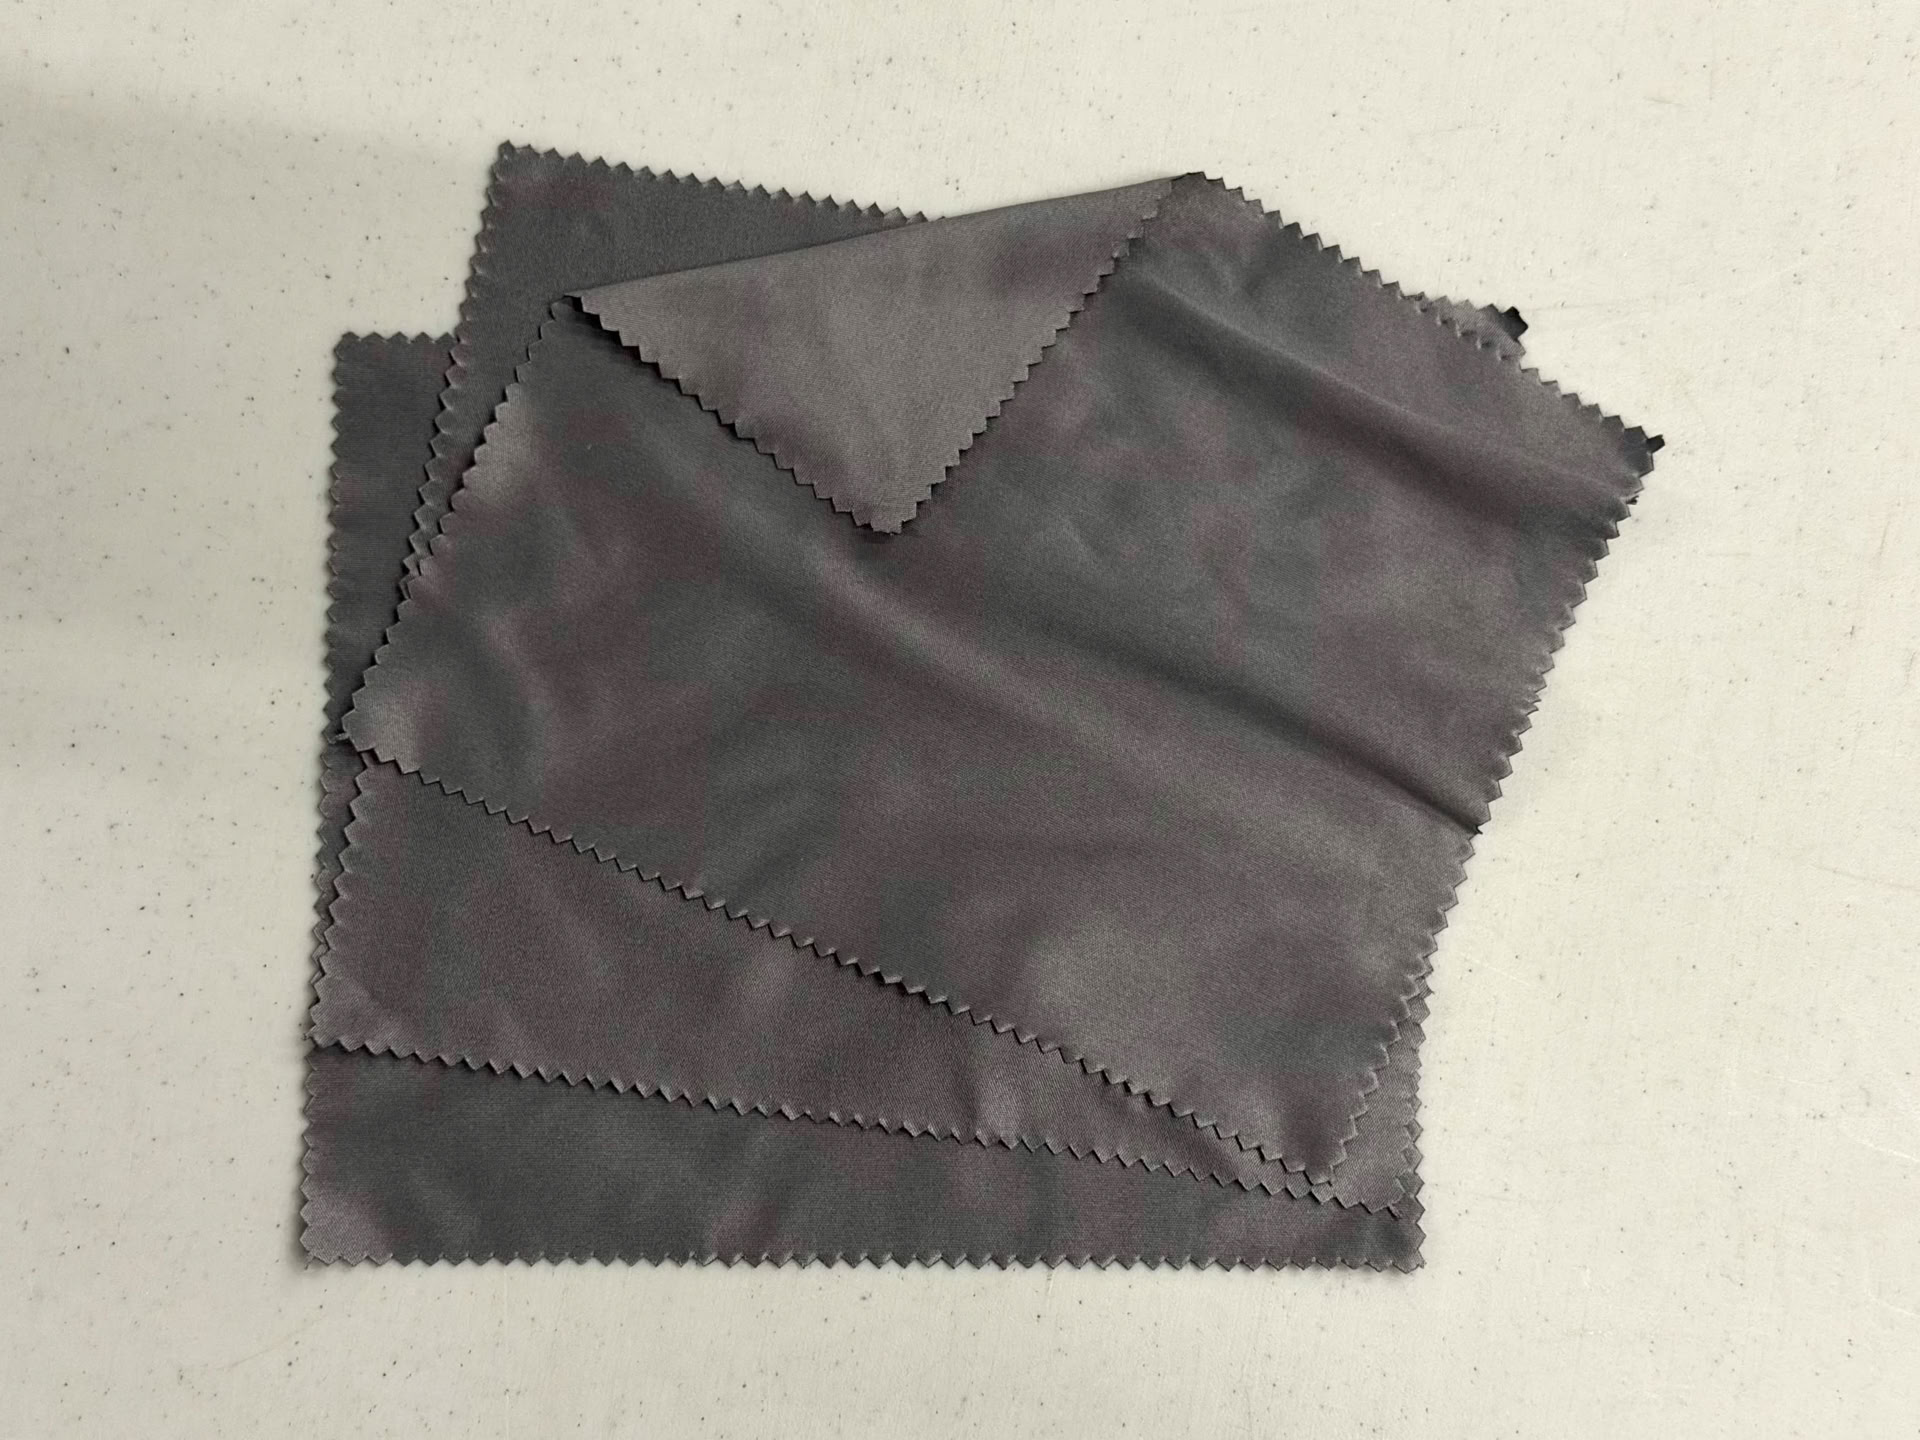
But ... what if you've lost that gray card, or forgot to bring it with you, or never had one in the first place. A simple tool that you should have in your camera bag anyway may come to the rescue, and that is a microfiber cloth. The intended purpose of a microfiber cloth, of course, is to keep your lens spotless. A dirty lens will lead to disappointing results every single time, in the form of spots and blots in your images. The particular microfiber cloths I carry are exactly 2 f-stops darker than the gray card I give students to meter from. And that means they can be used to accurately meter a scene you're trying to photograph.
Just as you would with the gray card, point your camera at the microfiber cloth, allowing it to fill the viewfinder. Because it's two f-stops darker than the traditional gray card, you'll want to adjust your camera settings so that the meter reads -2. Then, when you frame up your shot and capture whatever it is that you're photographing, your camera will correctly read those middle gray values and you should end up with a properly exposed subject.
What if your microfiber cloth is green or hot pink or made to look like a slice of pizza? Well, then this method won't work for you. But if you'd like a microfiber cloth that is two f-stops darker than a gray card, I might just know where you can get one ...
... as a matter of fact, if you want one, stop by and pick one up. (Just let us know you're coming so we can be sure we're here to greet you.)